


Minimap Icons /14

DeliriumShardOrangeDeactive

DeliriumShardOrangeActive

DeliriumDecanterOfMadness
광기의 디캔터

DeliriumMirror

DeliriumShardPurpleDeactive

DeliriumShardPurpleActive

DeliriumShardTealDeactive

DeliriumShardTealActive

DeliriumShardRedDeactive

DeliriumShardRedActive

DeliriumShardBlueDeactive

DeliriumShardBlueActive

DeliriumBossFinal

DeliriumBoss1
환영 아이템 /16
환영
환영 거울이 있는 지도에서는 거울을 통과해서 현재 지역 전체를 뒤덮는 환영 안개를 방출할 수 있습니다.
안개가 퍼져나가는 동안 그 속에 머물러야 환영을 유지할 수 있으며, 안개를 벗어나면 환영도 사라집니다.
안개 안에 있는 희귀 또는 고유 몬스터는 환영 악마를 출현시킬 수 있습니다. 출현한 환영 악마는 몬스터의 육신에 깃들어 간혹 자신의 스킬을 사용합니다.
환영 안개 안에서 추가 몬스터를 소환하는 분열의 거울을 발견할 수 있고, 안개의 일정 깊이에서는 더 다양한 보상을 제시하는 분열의 거울 파편을 발견할 수 있습니다.
지도 보스를 쓰러뜨리면 일정 확률로 주변의 지도에 웅장한 거울이 소환됩니다.
안개가 퍼져나가는 동안 그 속에 머물러야 환영을 유지할 수 있으며, 안개를 벗어나면 환영도 사라집니다.
안개 안에 있는 희귀 또는 고유 몬스터는 환영 악마를 출현시킬 수 있습니다. 출현한 환영 악마는 몬스터의 육신에 깃들어 간혹 자신의 스킬을 사용합니다.
환영 안개 안에서 추가 몬스터를 소환하는 분열의 거울을 발견할 수 있고, 안개의 일정 깊이에서는 더 다양한 보상을 제시하는 분열의 거울 파편을 발견할 수 있습니다.
지도 보스를 쓰러뜨리면 일정 확률로 주변의 지도에 웅장한 거울이 소환됩니다.
 복제된 영토 파편
중첩 개수: 1 / 300

복제된 영토
지도에 복제된 영토를 추가합니다.

큰까마귀의 투영
이것을 시든 버드나무에 있는 거울로 가져가십시오.
이것을 시든 버드나무에 있는 거울로 가져가십시오.





 농축된 액체 두려움


Delirium Doodad Category /1

The Forbidden Sanctum supporter pack: Forgekeeper
은신처에 오브젝트 생성
ContainsDelirium Ref /22
환영
환영 거울이 있는 지도에서는 거울을 통과해서 현재 지역 전체를 뒤덮는 환영 안개를 방출할 수 있습니다.
안개가 퍼져나가는 동안 그 속에 머물러야 환영을 유지할 수 있으며, 안개를 벗어나면 환영도 사라집니다.
안개 안에 있는 희귀 또는 고유 몬스터는 환영 악마를 출현시킬 수 있습니다. 출현한 환영 악마는 몬스터의 육신에 깃들어 간혹 자신의 스킬을 사용합니다.
환영 안개 안에서 추가 몬스터를 소환하는 분열의 거울을 발견할 수 있고, 안개의 일정 깊이에서는 더 다양한 보상을 제시하는 분열의 거울 파편을 발견할 수 있습니다.
지도 보스를 쓰러뜨리면 일정 확률로 주변의 지도에 웅장한 거울이 소환됩니다.
안개가 퍼져나가는 동안 그 속에 머물러야 환영을 유지할 수 있으며, 안개를 벗어나면 환영도 사라집니다.
안개 안에 있는 희귀 또는 고유 몬스터는 환영 악마를 출현시킬 수 있습니다. 출현한 환영 악마는 몬스터의 육신에 깃들어 간혹 자신의 스킬을 사용합니다.
환영 안개 안에서 추가 몬스터를 소환하는 분열의 거울을 발견할 수 있고, 안개의 일정 깊이에서는 더 다양한 보상을 제시하는 분열의 거울 파편을 발견할 수 있습니다.
지도 보스를 쓰러뜨리면 일정 확률로 주변의 지도에 웅장한 거울이 소환됩니다.
요구 사항: 레벨 65
지도 내 환영 안개가 사라지지 않음


SubTree: Delirium
환영 안개가 30% 더 느리게 사라짐


웅장한 거울을 활성화해야 합니다.
SubTree: Delirium
웅장한 거울을 활성화해야 합니다.
SubTree: Delirium
복제된 영토 내 파편이 20% 확률로 다중 선택 가능
웅장한 거울을 활성화해야 합니다.
SubTree: Delirium
환영 안개 내에서 고유 몬스터를 처치하면 일정 확률로 위력적인 감정이 떨어짐:
인간형 몬스터가 5% 확률로 위력적인 액체 우울을 떨어뜨림
야수가 5% 확률로 위력적인 액체 흉포함을 떨어뜨림
구조물이 5% 확률로 위력적인 액체 경멸을 떨어뜨림
인간형 몬스터가 5% 확률로 위력적인 액체 우울을 떨어뜨림
야수가 5% 확률로 위력적인 액체 흉포함을 떨어뜨림
구조물이 5% 확률로 위력적인 액체 경멸을 떨어뜨림
몬스터 속성
마법 및 희귀 몬스터에게는 다양한 방식으로 몬스터를 강화하여 더 좋은 보상을 주지만 더 강하고 치명적인 적이 되게 하는 속성이 부여됩니다. 마법 몬스터는 보통 몬스터 속성을 하나만 보유하는 반면, 희귀 몬스터는 기본적으로 최대 4개의 속성을 보유할 수 있습니다.
몬스터 속성 하나당 떨어지는 아이템의 희귀도가 100% 이상 증가하며, 몬스터가 추가 능력이나 영구적인 버프를 획득하기도 합니다.
몬스터 속성 확률은 희귀 몬스터 속성의 개수를 증가시키며, 4개를 초과하여 붙는 속성에는 속성 확률이 2배 필요합니다. 속성 개수 최대치를 초과하는 몬스터 속성 확률은 희귀 몬스터가 최대한 많은 속성을 가질 확률을 증가시킵니다.
아즈메리 혼백, 에센스, 환영 등의 메커니즘은 모든 희귀도의 몬스터에게 추가적인 몬스터 속성을 추가할 수 있습니다.
몬스터 속성 하나당 떨어지는 아이템의 희귀도가 100% 이상 증가하며, 몬스터가 추가 능력이나 영구적인 버프를 획득하기도 합니다.
몬스터 속성 확률은 희귀 몬스터 속성의 개수를 증가시키며, 4개를 초과하여 붙는 속성에는 속성 확률이 2배 필요합니다. 속성 개수 최대치를 초과하는 몬스터 속성 확률은 희귀 몬스터가 최대한 많은 속성을 가질 확률을 증가시킵니다.
아즈메리 혼백, 에센스, 환영 등의 메커니즘은 모든 희귀도의 몬스터에게 추가적인 몬스터 속성을 추가할 수 있습니다.
환영 MTX /14


환영
환영 거울이 있는 지도에서는 거울을 통과해서 현재 지역 전체를 뒤덮는 환영 안개를 방출할 수 있습니다.
안개가 퍼져나가는 동안 그 속에 머물러야 환영을 유지할 수 있으며, 안개를 벗어나면 환영도 사라집니다.
안개 안에 있는 희귀 또는 고유 몬스터는 환영 악마를 출현시킬 수 있습니다. 출현한 환영 악마는 몬스터의 육신에 깃들어 간혹 자신의 스킬을 사용합니다.
환영 안개 안에서 추가 몬스터를 소환하는 분열의 거울을 발견할 수 있고, 안개의 일정 깊이에서는 더 다양한 보상을 제시하는 분열의 거울 파편을 발견할 수 있습니다.
지도 보스를 쓰러뜨리면 일정 확률로 주변의 지도에 웅장한 거울이 소환됩니다.
안개가 퍼져나가는 동안 그 속에 머물러야 환영을 유지할 수 있으며, 안개를 벗어나면 환영도 사라집니다.
안개 안에 있는 희귀 또는 고유 몬스터는 환영 악마를 출현시킬 수 있습니다. 출현한 환영 악마는 몬스터의 육신에 깃들어 간혹 자신의 스킬을 사용합니다.
환영 안개 안에서 추가 몬스터를 소환하는 분열의 거울을 발견할 수 있고, 안개의 일정 깊이에서는 더 다양한 보상을 제시하는 분열의 거울 파편을 발견할 수 있습니다.
지도 보스를 쓰러뜨리면 일정 확률로 주변의 지도에 웅장한 거울이 소환됩니다.
지도 속성 부여 /1
| 이름 | 레벨 | Pre/Suf | Description | Weight |
|---|---|---|---|---|
| 1 | 고유 | 지역에 환영의 거울 등장 map affliction league [1] map extra content weighting [0] | default 1 |
강탈 장비 속성 부여 /4
| 이름 | 레벨 | Pre/Suf | Description | Weight |
|---|---|---|---|---|
| - 혼동 | 1 | 접미어 | (6—7)%의 확률로 강탈 상자에 들어 있는 환영의 오브 및 파편 복제 | heist_equipment_reward 1 default 0 |
| - 불확실 | 45 | 접미어 | (8—9)%의 확률로 강탈 상자에 들어 있는 환영의 오브 및 파편 복제 | heist_equipment_reward 1 default 0 |
| - 목소리 | 75 | 접미어 | (10—12)%의 확률로 강탈 상자에 들어 있는 환영의 오브 및 파편 복제 | heist_equipment_reward 1 default 0 |
| - 광기 | 83 | 접미어 | (13—15)%의 확률로 강탈 상자에 들어 있는 환영의 오브 및 파편 복제 | heist_equipment_reward 1 default 0 |
Trinket 속성 부여 /2
| 이름 | 레벨 | Pre/Suf | Description | Weight |
|---|---|---|---|---|
| - 미신 | 60 | 접미어 | 강탈에서 보상 상자를 열 때 1%의 확률로 환영 아이템 추가 획득 | default 1 |
| - 미신 | 80 | 접미어 | 강탈에서 보상 상자를 열 때 2%의 확률로 환영 아이템 추가 획득 | default 1 |
기타 속성 부여 /19
| 이름 | 레벨 | Domain | Pre/Suf | Description | Weight |
|---|---|---|---|---|---|
| 환영 | 1 | Strongbox | 접두어 | 환영 선도자 서판 1개 추가 등장 | strongbox_robot_rare_guard 0 strongbox_can_roll_waystone_replacements 1 default 0 |
| 1 | Atlas | 접두어 | 지도 내 환영 보상 게이지가 100% 빠르게 채워짐 사용 횟수 3회 남음 | unique_map 0 no_monster_packs 0 default 1 | |
| 1 | Atlas | 접두어 | 지도 내 환영 보상 게이지가 100% 빠르게 채워짐 사용 횟수 15회 남음 | unique_map 0 no_monster_packs 0 default 1 | |
| 1 | Atlas | 접두어 | 지도에 환영의 거울 등장 사용 횟수 3회 남음 map affliction league [1] | no_monster_packs 0 unique_map 0 default 1 | |
| 1 | Atlas | 접두어 | 지도에 환영의 거울 등장 사용 횟수 15회 남음 map affliction league [1] | no_monster_packs 0 unique_map 0 default 1 | |
| 1 | Atlas | 고유 | map atlas min waystone tier [6] map delirium has giga mirror [1] | ||
| 1 | MemoryLines | 고유 | 지역에 환영의 거울 등장 map affliction league [1] | ||
| 1 | Tower | 고유 | 지도에 환영의 거울 1개 추가 잔여 사용 횟수 10회 | ||
| 1 | Tower | 고유 | 지도에 환영의 거울 1개 추가 잔여 사용 횟수 5회 | ||
| - 영원성 | 1 | Tower | 접미어 | 지도 내 환영 안개가 (6—12)초 추가로 지속되고 사라짐 | tower_augment_delirium 1 default 0 |
| - 끊임없음 | 1 | Tower | 접미어 | 지도 내 환영 안개가 (20—30)% 더 느리게 사라짐 | tower_augment_delirium 1 default 0 |
| - 광증 | 1 | Tower | 접미어 | 지도 내 환영 안개가 플레이어에게 적용하는 환영 (15—30)% 증가 | tower_augment_delirium 1 default 0 |
| - 박해 | 1 | Tower | 접미어 | 지도 내 환영 몬스터의 무리 규모 (15—30)% 증가 | tower_augment_delirium 1 default 0 |
| - 거울 | 1 | Tower | 접미어 | 지도 내 환영 안개에서 생성되는 분열의 거울 (15—30)% 증가 | tower_augment_delirium 1 default 0 |
| - 시간 정지 | 1 | Tower | 접미어 | 지도 내 희귀 몬스터 처치 시 환영 거울 타이머 (3—5)초 동안 일시 정지 | tower_augment_delirium 1 default 0 |
| - 공포증 | 1 | Tower | 접미어 | 지도 내 환영 인카운터의 고유 보스 등장 확률 (15—30)% 증폭 | tower_augment_delirium 1 default 0 |
| - 산산조각 | 1 | Tower | 접미어 | 지도 내 환영 안개에서 생성되는 거울 파편 (12—26)% 증가 | tower_augment_delirium 1 default 0 |
| 1 | Tower | 고유 | 지도 내 환영 안개가 사라지지 않음 | ||
| 1 | Tower | 고유 | 지도 내 환영 안개가 플레이어에게 적용하는 환영 (-10—10)% 감소 |
아이템 /5

흐트러진 지식의 서 I
기술의 서입니다. 우클릭하면 환영 아틀라스 패시브 스킬 포인트를 2포인트 얻습니다.
환영 아틀라스 패시브 스킬 포인트 2포인트 부여
흐트러진 지식의 서 II
기술의 서입니다. 우클릭하면 환영 아틀라스 패시브 스킬 포인트를 2포인트 얻습니다.
환영 아틀라스 패시브 스킬 포인트 2포인트 부여
흐트러진 지식의 서 III
기술의 서입니다. 우클릭하면 환영 아틀라스 패시브 스킬 포인트를 2포인트 얻습니다.
환영 아틀라스 패시브 스킬 포인트 2포인트 부여
흐트러진 지식의 서 IV
기술의 서입니다. 우클릭하면 환영 아틀라스 패시브 스킬 포인트를 2포인트 얻습니다.
환영 아틀라스 패시브 스킬 포인트 2포인트 부여
고유 /1
요구 사항: 레벨 65
지도 내 환영 안개가 사라지지 않음
Passive /14
SubTree: Delirium
환영 안개가 30% 더 느리게 사라짐
웅장한 거울을 활성화해야 합니다.
SubTree: Delirium
웅장한 거울을 활성화해야 합니다.
SubTree: Delirium
복제된 영토 내 파편이 20% 확률로 다중 선택 가능
웅장한 거울을 활성화해야 합니다.
SubTree: Delirium
환영 안개 내에서 고유 몬스터를 처치하면 일정 확률로 위력적인 감정이 떨어짐:
인간형 몬스터가 5% 확률로 위력적인 액체 우울을 떨어뜨림
야수가 5% 확률로 위력적인 액체 흉포함을 떨어뜨림
구조물이 5% 확률로 위력적인 액체 경멸을 떨어뜨림
인간형 몬스터가 5% 확률로 위력적인 액체 우울을 떨어뜨림
야수가 5% 확률로 위력적인 액체 흉포함을 떨어뜨림
구조물이 5% 확률로 위력적인 액체 경멸을 떨어뜨림
환영 Mods /44
| 이름 | Description |
|---|---|
| monster is in affliction fog [1] | |
| 공간 왜곡 | corpse cannot be destroyed [1] |
| 연속 태풍 | |
| 추방하는 화염 | |
| 겨울 나사선 | |
| 타쇄하는 공포 | |
| 복수심에 불타는 영혼 | |
| 복수심에 불타는 뼈 | |
| 소모시키는 손길 | affliction monster debuff energy shield recovery rate +% on hit [-9] affliction monster debuff life recovery rate +% on hit [-9] 생명력 에너지 보호막 |
| 마비시키는 손길 | affliction monster debuff action speed +% on hit [-6] 속도 |
| 침식하는 손길 | affliction monster debuff damage taken +% on hit [6] 피해 |
| 희석시키는 손길 | affliction monster debuff flask charges gained +% on hit [-9] affliction monster debuff flask effect +% on hit [-9] |
| 시체 생성 | |
| 시체 분쇄 | |
| 시체 부패 | |
| 복수심에 불타는 추적자 | base monster will be deleted on death [1] cannot die [1] delete on death [1] |
| 복수의 폭발 | |
| 복수의 추적 | |
| 복수의 손아귀 | |
| 복수심에 불타는 무리 | |
| 복수심에 불타는 일당 | |
| 복수의 하늘불꽃 | |
| 빙하 작용자 | |
| 얼어붙은 용수로 | |
| 고드름 화관 | |
| 불태우는 길 | |
| 그을린 대지 | |
| 불의 고리 | |
| 감전 폭탄 | |
| 화살 교차 | |
| 산발 태풍 | |
| 삐죽삐죽한 팽창 | |
| 파고드는 칼날 | |
| 타쇄하는 도약 | |
| 진노 | |
| 죄책감 | |
| 탐욕 | |
| 집착 | |
| 선망 | |
| 혐오 | |
| 절망 | |
| 두려움 | |
| 고통 | |
| 고립 |
Delirium Stash Tab /29
복제된 영토 파편중첩 개수: 1 / 300
복제된 영토
지도에 복제된 영토를 추가합니다.
농축된 액체 두려움
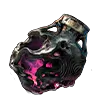





 고대 농축된 액체 두려움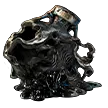
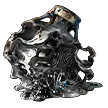

 위력적인 액체 흉포함
중첩 개수: 1 / 10
해당 지역 플레이어에게 나타나는 환영의 강도 50%
루비 접두어: 접미어 효과 (40—60)% 증가
루비 접미어: 접두어 효과 (40—60)% 증가
사파이어 접두어: 접미어 효과 (40—60)% 증가
사파이어 접미어: 접두어 효과 (40—60)% 증가
에메랄드 접두어: 접미어 효과 (40—60)% 증가
에메랄드 접미어: 접두어 효과 (40—60)% 증가
다이아몬드 접두어: 접미어 효과 (40—60)% 증가
다이아몬드 접미어: 접두어 효과 (40—60)% 증가
 위력적인 액체 경멸
중첩 개수: 1 / 10
해당 지역 플레이어에게 나타나는 환영의 강도 50%
루비 접두어: 접미어 속성 부여의 최대 개수 +1개
루비 접미어: 접두어 속성 부여의 최대 개수 +1개
사파이어 접두어: 접미어 속성 부여의 최대 개수 +1개
사파이어 접미어: 접두어 속성 부여의 최대 개수 +1개
에메랄드 접두어: 접미어 속성 부여의 최대 개수 +1개
에메랄드 접미어: 접두어 속성 부여의 최대 개수 +1개
다이아몬드 접두어: 접미어 속성 부여의 최대 개수 +1개
다이아몬드 접미어: 접두어 속성 부여의 최대 개수 +1개
 고대 위력적인 액체 우울
중첩 개수: 1 / 10
루비 접두어: 반경이 매우 넓은 반경으로 업그레이드
local jewel effect base radius [500]
local jewel effect base radius [500]
사파이어 접두어: 반경이 매우 넓은 반경으로 업그레이드
local jewel effect base radius [500]
local jewel effect base radius [500]
에메랄드 접두어: 반경이 매우 넓은 반경으로 업그레이드
local jewel effect base radius [500]
local jewel effect base radius [500]
다이아몬드 접두어: 반경이 매우 넓은 반경으로 업그레이드
local jewel effect base radius [500]
local jewel effect base radius [500]

 고대 위력적인 액체 경멸
중첩 개수: 1 / 10
루비 접두어: 접미어 속성 부여의 최대 개수 +1개
루비 접미어: 접두어 속성 부여의 최대 개수 +1개
사파이어 접두어: 접미어 속성 부여의 최대 개수 +1개
사파이어 접미어: 접두어 속성 부여의 최대 개수 +1개
에메랄드 접두어: 접미어 속성 부여의 최대 개수 +1개
에메랄드 접미어: 접두어 속성 부여의 최대 개수 +1개
다이아몬드 접두어: 접미어 속성 부여의 최대 개수 +1개
다이아몬드 접미어: 접두어 속성 부여의 최대 개수 +1개
Atlas passive skill Passive /17


SubTree: Delirium
환영 안개가 30% 더 느리게 사라짐
웅장한 거울을 활성화해야 합니다.
SubTree: Delirium
웅장한 거울을 활성화해야 합니다.
SubTree: Delirium
복제된 영토 내 파편이 20% 확률로 다중 선택 가능
웅장한 거울을 활성화해야 합니다.
SubTree: Delirium
환영 안개 내에서 고유 몬스터를 처치하면 일정 확률로 위력적인 감정이 떨어짐:
인간형 몬스터가 5% 확률로 위력적인 액체 우울을 떨어뜨림
야수가 5% 확률로 위력적인 액체 흉포함을 떨어뜨림
구조물이 5% 확률로 위력적인 액체 경멸을 떨어뜨림
인간형 몬스터가 5% 확률로 위력적인 액체 우울을 떨어뜨림
야수가 5% 확률로 위력적인 액체 흉포함을 떨어뜨림
구조물이 5% 확률로 위력적인 액체 경멸을 떨어뜨림
Community Wiki
Edit
Wikis Content is available under CC BY-NC-SA 3.0 unless otherwise noted.
Delirium
- Unique Rewards:
- Distilled Ire, Distilled Guilt, Distilled Disgust, Distilled Greed,
- Simulacrum Splinter, Simulacrum
- Delirium Precursor Tablet
- Pinnacle Boss: Simulacrum Encounter, Kosis, The Revelation
Some maps have been touched by insanity. A mysterious entity has taken special interest in you.
Step through the looking glass and you will find your nightmares coming to life. When you touch the mirror, the mists of Delirium will spread out across the area, infecting your mind.
You must stay within the mist to maintain the nightmare, which is as profitable as it is terrifying. Everything you kill will increase the rewards that drop.
However, the deeper into the mist you travel, the stronger the monsters are. Be careful not to overstay your welcome.
Rare and unique enemies will become vessels for terrifying demons who will manifest out of them to unleash powerful attacks on you.
Drops
- Assailum
- Melting Maelstrom
- Perfidy
- Collapsing Horizon (Difficulty 2+)
- Strugglescream (Difficulty 4)
- Megalomaniac (Difficulty 4)
Storyline
- New Storyline: An ancient Trickster God has been unleashed, spreading madness across Wraeclast. Do you dare to uncover his origins and confront your darkest fears? See https://pathofexile2.com/ancients#delirium for more details.
- There is now a hub area "The Withered Willow" for Delirium to the south-west of your starting location on the Atlas. The maps around this location all contain Deliriums, and give you points for the Delirium Atlas Passive Tree.
- The Delirium Atlas Passive Tree has been completely revamped with many new nodes and existing nodes changed.
- After breaking a Delirium mirror, there is now a progress bar showing how deep you are in the fog, and how long you have until the fog clears. The start of the Delirium bar represents your initial location at the Delirium mirror, the end of the Delirium bar represents the location of the map boss.
- There are now a set of new Delirium Encounters that can be seen on the Delirium bar. Reaching certain depths will cause coloured mirror shards to appear. Walking into the mirror shards will break them, activating the new encounters.
- The direction of the map boss can be observed by looking at the fog effect. Moving in the direction of the fog will always lead you to the map boss.
- Map bosses in Delirium will always be 100% delirious.
- The damage and life bonus given to monsters from Delirium has been reduced.
- Added 5 new Elite Delirium Monsters
- Added a new sub-area: Loathsome Mire.
- The Loathsome Mire drops two new Amulet base types that grant two instilled notables at the cost of either -1 suffix or -1 prefix.
- Liquid Emotions can now be used to craft additional mods on Jewels. These work similarly to greater essences, each having a set of specific mods that will replace a random existing mod on the item.
- Completing Delirium Mirrors now has a chance to spawn Grand Mirrors on the Atlas on a nearby map. Grand mirrors create a duplicate of the map boss in the affected map. Killing both map bosses will unlock a new atlas mechanic: The Trial of Madness
- After triggering the Trial of Madness, fog will spread from a map of your choosing on the Atlas including a locked Simulacrum. While inside the fog, the entire map is Delirious starting at 10%. Killing Rare monsters and the Map boss increases the Deliriousness of all maps in the fog. On reaching 100% the Simulacrum will become available. Deliriousness can continue to be increased up to 200% delirious.
- Rare and Unique monsters in Delirious maps have a set of new Delirious modifiers giving them strange new abilities.
- Map bosses of Delirious Maps can additionally drop a new set of 3 Potent emotions that can be used to craft new powerful modifiers on Jewels that are not available in the normal Jewel mod pool. These emotions can also be used to instill a set of 16 new Passive Tree Notables that are not normally available on the passive tree.
- Simulacrum has been updated, and is now a 7-wave encounter.
- Completing a Simulacrum will now give you a key to face the new Delirium Pinnacle Boss
- There is new set of 10 Ancient Emotions that can drop if unlocked by the Atlas Tree which can be used to craft Timelost Jewels. There are also 3 Ancient Potent emotions that can be used to craft new powerful modifiers on Timelost Jewels that are not normally available in the mod pool.
- Some non-amulet Delirium Uniques now drop with the Raven-Touched modifier allowing them to be instilled.
Wikis Content is available under CC BY-NC-SA 3.0 unless otherwise noted.